6 Things You Can Do to Prepare to Teach the UoS in Reading

uos

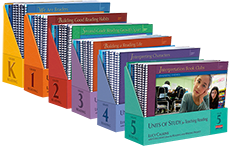
Summer is a great time to dive into the Reading Units of Study books!  Here are 6 things you can do to get started with this new curriculum!

  1. Review the Guide to the Reading Workshop book for information on what a reading workshop entails.  Familiarize yourself with all the parts; Independent Reading; Mini Lessons; Small Groups; Conferencing; Assessment; Management; Partner Reading; Book Clubs; etc.   This is a comprehensive go-to guide.  (Notes:  Primary / Intermediate)
  2. Read the books from the Trade Book pack.  Highlight / post-it things you want to point out to your students when you read aloud.  Think about what your teaching points might be.  **Primary Only- Place the post-its that come with the kit in the books on the correct pages.  What do the post-its focus on?  What strategies will you be teaching students
  3. Get to know your assessments!  
    1. Primary – There is a chapter in the Guide to the Reading Workshop book on the different assessments you can use.  Really take a good look at the running records part – are we using running records to get the most information from them?  Think about other assessments you may want to try – Concepts about Print, etc.
    2. Intermediate – Get to know the Reading Pathways book that comes with the kit.  Take a look at the Learning Progressions.  Where do we want kids to be?  Read through the Performance Assessments.  What do they ask students to do?
  4. Think about your plan for the year.  The kit comes with 4 Units of Study, but the program encourages teachers to teach 6-8 units.  What will your year look like?  What other units could you teach?  Take a look at the Teacher’s College Reading and Writing Project suggested year-long curricular plan to help you sketch out your year.
  5. Get to know the If Then book in your kit.  Are there units in that book that you would like to try?
  6. Start planning Unit 1.  Use this Planning Guide to help you!  

Some planning and work getting to know these materials on the front-end will make next year much easier as you begin to implement!  

How have you started to prepare?  Let us know what you found especially helpful!!

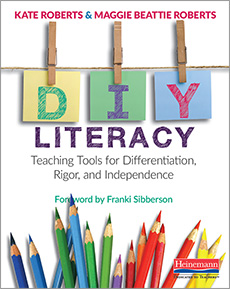
Book Talk: Do It Yourself Literacy by Kate and Maggie Roberts

diy


I love to watch HGTV!  I love to see all the fun home improvements that the casts of the different shows create.  I can sit for hours watching Property Brothers, Fixer Upper and Love it or List it, and think “I would LOVE to do that to my house!”

That is the same feeling that I got when I read DIY Literacy by Kate and Maggie Roberts.  “I would LOVE to do that in a classroom!”  In this book, Kate and Maggie give you tools to help you solve some of the problems that we all face in our ELA classes!  They give simple, common-sense ways to problem solve.  And unlike those HGTV shows, these are fixes that anyone could actually accomplish without contractors!

One of my favorite chapters in the book is what they call a Bonus Chapter.  In it, the authors recognize that we all have problems that our students face and validate that we have the smarts to fix them ourselves!  By working together with other teachers, reading great books like this one and searching through online resources, we can come up with strategies for the trouble spots all our students face.  Students not writing in complete sentences?  We can fix that!  Are they unable to discern a theme?  We can handle that!

In addition to this new book, Kate and Maggie also have a blog called Indent.  On this blog, they have created a video series that walk you through specific strategies you can use to help students with a myriad of problems.  These strategies include Demonstration Notebook (my personal favorite), Anchor Charts, Personal Bookmarks and Micro-Progressions.    To date, they have all 8 videos posted!  See below for a summary of the problem/solutions they discuss.

Episode 1
Problem:  3rd Grade students aren’t using punctuation when they write.
Solution:  Use a demonstration notebook!
Episode 2
Problem:  6th – 8th Grade students are reverting to summary writing in their Reader’s Notebook instead of choosing higher level topics.  
Solution:  Create an anchor chart!
Episode 3
Problem:  6th Grade readers are good at finding evidence in the text, but they struggle with analyzing the evidence to say why it is important!
Solution:  Create a “pathway” for students that gives them concrete steps to try! (Think Writing/Reading Pathways books!)
Episode 4
Problem:  8th Graders are struggling with “showing” in their writing.  Instead they are “telling” what happened.  They want to describe their characters rather than showing through action what their characters are like.
Solution:  Demonstration notebook
Episode 5
Problem:  How do you confer with higher level readers?  
Solution:  A Student-Led Bookmark
Episode 6
Problem:  6th Graders are struggling with MOTIVATION!  How do we get them to work independently?
Solution:  Create a micro-progression (pathway) for students to self-assess their independent work each day.
Episode 7
Problem:  Students are not using mentor texts independently.
Solution:  Anchor Charts
Episode 8
Problem: 7th and 8th grade teachers want students to get away from writing cliche themes.
Solution:  Demonstration Notebook


Beginning with the End in Mind: A Guide to Planning the Units of Study in Reading

career_pathways_FB

It is so exciting to begin work on the new Units of Study in Reading!  But any new curriculum can seem daunting when you first begin to teach it!  There is a lot of information jam-packed into those units.  And while it’s all great stuff, sometimes it can seem a little overwhelming!

One of the things we have learned from our last roll out of the Writing Units of Study is that it is actually MORE difficult to just jump in and start teaching from Session 1.   When you do that, the big idea of the unit is not clear and sometimes the sessions seem confusing… “Why are they asking us to teach this now… or in this way?”  

One of Stephen Covey’s 7 Habits for Highly Successful People is Begin with the End in Mind.  Covey says that “To begin with the end in mind means to start with a clear understanding of your destination.  It means to know where you’re going so that you better understand where you are now so that the steps you take are always in the right direction.”   This is also true for highly successful implementation of the Units!  It is better to get a clear picture of where the unit is going, so you can make sure to stay on the right path to get there!

There are a number of things that teachers can do to help them get a big – picture look at the Unit of Study that they are going to begin.  Lots of these steps are laid out for you in the video Mini-Courses that Teacher’s College Reading and Writing Project have on their website.  They are also embedded within the Guide to the Reading Workshop, which comes with the kit, and also in the units themselves!  Here is a list that we gave to our teachers to help them navigate through the work!

(You will note that this is written for a team of teachers.  It is always better to work together!  But the planning can be done on your own as well.)

Planning for the Units of Study in Reading

    1. Get a “big picture” of what this unit entails
      1. Jigsaw “An Orientation to the Unit” starting at the subtitle Overview  OR
      2.  Watch the grade level Reading Mini-Courses video on TCRWP
        1. Unit 1 for all grade levels now available
        2. Unit 2 for grades 4-5 now available
    2. Check out the online resources (To login, you will need to look at your Guide to the Reading Workshop book.  Directions to log in can be found on the inside of the front cover)
      1. Print the Pre Assessment/Post Assessment (gr 3-5)
      2. Print the Student Rubric / Learning Progression (gr 3-5)
        1. Analyze – What will the kids need to be able to do? on these assessments
      3. Check out other Unit Resources
    3. Review the “Getting Ready” section from the overview- make a list of what you will need
  1. Look at pages iv – v (The Table of Contents)
    1. Which teaching points seem most important?
    2. Which teaching points do you feel your kids already have a good grasp of?
    3. Star the lessons that you want to spend more than 1 day and STICK TO IT!
  2. The Sessions
    1. Hints on making the reading less overwhelming:
      1. In the session introduction, skip to where it says “In this session…”
      2. Don’t worry about the coaching parts on the right hand side
      3. the conferring and mid-workshop portions are suggestions – you don’t need to read through all of it if you don’t want/need to!
    2. Jigsaw the lessons in Bend 1 with your team.  Highlight the big ideas.  Share with your group.


Here is a downloadable planning sheet

Here is the TCRWP Study Guide for the Workshop Curriculum K-5

How do you prepare to teach the units?  Please let us know your thoughts!

Using Charts to help teach CCSS

Our district was very lucky to have Marjorie Martinelli, co-author of Smarter Charts, and staff developer from TCRWP, come to present on Reading Workshop to our primary grade teachers. Marjorie did such a great job and we were so lucky to have the chance to learn from her experiences and expertise.

smarter charts

Smarter Charts is a wonderful book that describes how anchor charts could be used to help students become more independent and successful readers and writers. In the book, the authors refer to Loris Malaguzzi, founder of the Reggio Emilia approach to primary education. He believed that the classroom environment is the child’s “third educator,” and that it has to be flexible and it has to undergo frequent modification by the children and the teachers in order to meet the needs of students. Anchor charts can create this kind of environment for students.

How can teachers create these kinds of charts?

1. Charts should reflect the students’ reading level. Smarter Charts recommends that the charts created in the classroom mimic the amount of print on a page, the spacing between words and the number of lines of print that children are used to seeing in their reading. Therefore, first grade charts would look much different from fourth or fifth grade charts.
2. Charts should be created with students so that they have some ownership of what goes on it, and will therefore refer to it. It is not necessary that the entire chart is created together, but it should not be something that is completely pre-made either. Charts should be a work in progress, one that helps students to remember the major points of the mini lessons you teach.
3. There has to be some system in place that helps students to remember to refer to charts when needed. After all, that is why they are created…to help students become independent problem solvers! Systems could include simple things such as having students post-it note the chart they used (or want to use); students can sign charts they have become “expert” on and then other students can go to them for help; teachers could ask students “Which chart could help you with that?” during mini-lessons, after workshop shares or conferences. The idea is to constantly remind students to use the charts and information that is available to them. They are NOT wallpaper!

Charts can be extremely helpful in getting students to understand the complex strategies and processes of the new CCSS in ELA. Breaking down these complex strategies into simple and easy to follow processes can make them more accessible to more children.

Here are 2 charts that I found online that would help students with Standard 5, which has to do with analyzing text structure to make meaning.

RI. 2.5  Know and use various text features (e.g., captions, bold print, subheadings, glossaries, indexes, electronic menus, icons) to locate key facts or information in a text efficiently.

RI. 2.5 Know and use various text features (e.g., captions, bold print, subheadings, glossaries, indexes, electronic menus, icons) to locate key facts or information in a text efficiently.

RI. 4.5  Describe the overall structure (e.g., chronology, comparison, cause/effect, problem/solution) of events, ideas, concepts, or information in a text or part of a text.

RI. 4.5 Describe the overall structure (e.g., chronology, comparison, cause/effect, problem/solution) of events, ideas, concepts, or information in a text or part of a text.

These charts can show a progression of learning throughout the school. The first one more closely aligns with the second grade standard, while the second chart would better fit the fourth grade standard. This makes anchor charts a useful tool for principals as well. It is a great way to see exactly what the kids are learning at each level. As in the example above, you would not want to see the first chart in the upper elementary grades, or the second chart in the lower grades.

In the book Smarter Charts, the authors suggest that anchor charts should

– be clear, easy to understand and easy to find
– display content that is current and supports increasingly complex skills
– have a clear purpose
– include steps for how to do specific strategies or procedures
– have visuals including symbols, pictures, and or photos to go with words

Students, like us, can easily become overwhelmed by complexity and clutter. So although charts are a good idea, it probably isn’t a good thing to have too many hanging around the room. 4-5 are usually a good number. Once most students have mastered the skill, the charts can then be “retired” and taken down. Sometimes a few students may need the support of a chart for a longer period of time. In these cases, you can take pictures of it and add it to the student’s reading notebook so they can have their very own copy for reference. Some teachers even use plastic picture frames containing charts at students’ tables.

Charts are an excellent tool that can help students become independent thinkers and problem solvers when working to master the CCSS. And although the standards are complex, when the processes are broken down and displayed for students, they can more easily internalize and master them. Charts don’t have to be perfect! They are most successful when they are created by or with students, and modified or altered as students’ understanding of the concept changes.

There are many great examples of anchor charts online. Some good sites to find some are

http://chartchums.wordpress.com/ (Marjorie’s Blog)

http://fabulous-fourth.blogspot.com/p/anchor-charts.html

Please use the comment box below to let us know how you use charts in your classroom.

Reading Conferences and Evernote

There are many ways to keep conference notes digitally!  Click here to see my post on using Google!

Conferences in reading are individualized teaching opportunities. They are a time to sit with a student one-one and find out exactly what strategies are being used to decipher and comprehend text. Conferences are similar to coaching. You watch the reader at work and then choose one specific thing that would help them be even stronger readers in the future. The 5-7 minutes that you spend with each student is a valuable time for individualized feedback on a student’s performance.

Conferences can also be good feedback for you on how the class is doing as a whole. What did you notice about the strategies that readers were using? Were they all using the same ones? Did they all struggle in the same areas? Which students needed which specific skills to be better readers? Using the information that you can glean from reading conferences can help you set up the rest of your reading instruction: whole group, small strategy groups, or guided reading.

The trick is to organize the information you have gained so that it is easily transferrable to your instruction. That is where Evernote can help! Evernote is a free app for iPhone or iPad that helps to organize notes of all kinds, but it can be especially useful in conferencing. Below, I will walk through how you can use this app to help you run your reading workshop. You may first want to watch this introductory video that will walk you through the basics.

The first thing you will want to do (after you download the app:) is to set up your notebooks. You will probably want to create one notebook for each student. That will look like this…

notebooks 1

Once that is set up, you can begin your conference! I am going to go through a conference in the TCRWP format: Research the reader, Compliment the reader, Choose teaching point/Demonstrate, Active involvement and then the Link.

To demonstrate what this would look like, I conducted a reading conference with my son, Ryan. (He’s such a good sport:)

Researching the Reader:

The first thing that you will want to do is to open up the notebook for the student that you will conference with. Create a new note with the child’s name and the date in the title line.

You can start the conference with “What are you working on as a reader?” This is the time to find out if the child understands what they are reading, how their fluency is going, if they are growing as readers.

Ryan was reading the book, The Dead and the Gone by Susan Beth Pfeffer. In this case, he mentioned that he was having trouble keeping track of characters. There were too many of them! I asked Ryan to read a few paragraphs aloud so that I could make sure that this book was not too difficult for him. In Evernote, you can also record voices by clicking on the microphone at the top.

notes 2

Complimenting the Reader:

In a conference, it is important to find something to compliment the reader on. This is important because you want your students to realize that they are growing as readers. In this conference, I told Ryan that his fluency was very good. He used great expression and didn’t struggle with any words. That told me he had chosen a just right book for him. I also congratulated him on choosing a book that would offer a little bit of a challenge for him and sticking with it! That was important so he could become a stronger reader.

Teaching Point/ Demonstrating:

I decided to teach Ryan how to keep track of his characters by using a chart and told him so explicitly. I asked him to open up his reading notebook and we drew a chart. I then went back to the beginning of his book and began to read aloud. As I did so, I took notes in his notebook on the characters that I came across.

In Evernote, you can take a picture with your i-Phone/i-Pad to document what you worked on by clicking the Camera at the top of the page.

notepic 3

Active Engagement:

I then asked Ryan to continue reading and show me what notes he would take. I let him read along and watched as he took notes on the next character that was introduced, Uncle Jimmy.

Link:

After being certain Ryan knew how to take notes, I left him saying that these kind of charts can help him in any book he reads when he has trouble keeping track of characters.

Organizing the information in order to plan instruction:

Now it’s time to code the notes from this conference so that you can organize the information. Tagging can help you see what skills you focused on with the class. To tag a note, you click on the i at the top of the page, choose tags and then type the skill that you worked on with the student. By clicking the plus sign, this will save the tag so you won’t have to keep typing it every time a student needs that strategy.

notetag 4

On the Evernote homepage, go to the Tags tab and all of your tags will be organized into strategy groups!

notegroups 5

When you click on the strategy tag, the students notes will come up that needed to work on that strategy. There are your strategy groups!!

notegroupnote 6

This information can be organized in many ways… You may want to tag your compliments so that you can see what areas your students are strong in. When you see large groups of students struggling in the same area, you could decide a mini lesson would be most appropriate to teach that skill.

Conferencing is formative assessment in reading. It gives you the opportunity to individually meet each student where they are and make them better, stronger readers. Many teachers have successful systems for managing the information from conferences. Some use a binder with a tab for each student. Some use a post-it note system; some use individual notebooks. Evernote is just one digital option. If you would like to find out more about how Evernote can help you in the classroom, this link will lead you to more resources.

If you know of other tools that could be used to organize conference notes, please share them in the comment box below!

I would like to thank @kerilyn_obrien and @mrsbuckeyebino for the links above and for introducing me to this great resource!

Other Great Resources for Evernote:

Six Ways to Use Evernote to Capture Learning


Using Evernote to Guide Your Guided Reading Groups

Using Evernote for Fluency

Using Evernote with Secondary Students
What do good readers do? Examining texts for teaching ideas

Last week, our district was lucky enough to be able to offer some very high quality professional development to our teachers. We had the Teachers College Reading and Writing Project Staff Developers come to do a primary and an intermediate session on the Reading Workshop. What a great week of learning! And certainly overwhelming at times, as there was so much information shared.

That’s what I want to talk about… the feeling that teaching in a reading workshop is overwhelming. It certainly can be because there is simply so much to know… how readers learn to read, what books will match which readers, how to manage and structure teaching in this format.

But, on the flip side, this way of teaching is also intuitive. There IS a lot to know, but we already know A LOT! Just the fact that you are reader means that you have the strategies to help you navigate through difficult texts. It means that you understand that reading is thinking. It means that you have a strategy toolbox right inside your head!

Emily DeLiddo was our Intermediate Grades Staff Developer. One of the activities that she had us do, which I found extremely useful, was to read a text and really stop to think what strategies we were using. This was difficult to do. If you are like me, then your reading just flows and you don’t even notice all the things that are happening, all the strategies that your brain employs to help you create a “movie in your mind.” But if you really slow yourself down, you will see that there is actually a lot going on while you are reading!

Why is this helpful? Because when we are teaching reading, it is as if we were a coach mentoring a young player. The coach knows what good players do, and can teach his team the behaviors that will make them successful. If we become aware of what we are doing as readers, then we can share that information with our students so that they can join the literacy team!

chaising redbird

For this exercise, I chose the book Chasing Redbird by Sharon Creech. I had never read this book before, but have always loved Creech’s writing style! Walk Two Moons is one of my favorite books, ever!! So as I began to read, it was hard for me to remember to stop myself and ask “What did I do there as a reader?” But when I DID remember to do that, here is the list of things I caught myself doing:

– Good readers infer and then revise as new information is offered.
– Good readers notice things that characters say and make inferences about the characters.
– Good readers re-read when things don’t seem right or are confusing.
– Good readers notice when characters act strangely or when their behaviors, actions or words stand out. This can help them predict future action or storyline.

And all of this was in the first 40 pages!

Why was this helpful?

Because it made me realize that understanding Chasing Redbird WITHOUT using these strategies would have been much more difficult. If I didn’t pick up on the fact that both Uncle Nate and Aunt Jessie were acting strange about the trail Zinny found, it may have made the problem of the story more difficult to understand. If I didn’t notice that Zinny felt isolated from her family and guilt over her cousin’s and aunt’s deaths, it may have made it more difficult for me to understand how important uncovering that trail was to her. Good readers continually interact with text.

Emily DeLiddo suggested we list these strategies that good readers use and then print them off and keep them handy. They could be used for reading conferences with students, interactive read aloud lessons, or strategy group lessons. Students may need help as they try ever increasing text complexity. Understanding what good readers do can help them as they move along the literacy continuum and can help them join the literacy team!

Emily also encouraged us to share our lists of strategies with each other so we would all have a more comprehensive list. As you read your summer reading books, try and slow down and notice all the strategies you are employing. You can then share them with all of us in the comments section! We can all benefit from your reading expertise!